According to Mendix documentation, a nanoflow can be called from Javascript using the following code:
mx.data.callNanoflow({
    nanoflow: this.TheNanoflowToBeCalled,
    context: this.mxcontext,
    callback: function(result) {
        alert("Nanoflow completed with result " + result);
    },
    error: function(error) {
        alert(error.message);
    }
});
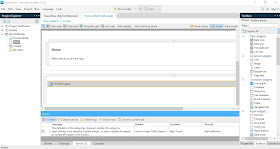
However, a nanoflow can be called from a widget as long as the nanoflow object is declared and passed as a property of the widget. Therefore, if the property is not set, the following error will be shown:
The solution to this issue is to customize the widget. The same method can be applied for other widgets but this post will focus on HTML/ JavaScript Snippet.
Below are described the steps to customize this widget.
1. Open the HTMLSnippet.mpk with any archiving tool such as 7zip
2. Edit the XML file corresponding to the widget that you are using. For example, if you are using HTML Snippet in the Mendix project, the following changes will be done in the file HTMLSnippet.xml. Open this file and add the following additional property that points to the nanoflow:
 <property key="TheNanoflowToBeCalled" type="nanoflow" required="false">
 <caption>Nanoflow to be called</caption>
 <category>Behavior</category>
 <description>This nanoflow is called from the widget</description>
 <returnType type="Void"/>
 </property>
3. Place back the edited file in the archive
4. Close the Mendix modeler and reopen the project. After that, run the project locally and an error will be displayed in the Console saying that the definition of the widget has changed:
5. This means that the widget needs to be updated. To update it, right click and press "Update all widgets". This is needed for the modeler to reload the widget and detect the newly added property.
6. Open the properties of the widget and the new property TheNanoflowToBeCalled will show up on the Behaviour tab:
7. Press Select and select the nanoflow:
The downside of this approach is that the modified widget has been customized and thus will have to be maintained.
References


No comments:
Post a Comment